Anytime someone asks me about setting up a blog, I tell them they have to use WordPress for content management and they have to use HostGator for hosting.
It sounds complicated for someone who’s never started a blog or website, but it’s really not that difficult. And the good news is that once you’ve set up your blog, you don’t have to go through these steps again unless you decide to start another blog.

How Much Does It Cost?
This method isn’t free – not like if you went to WordPress.com or Blogger.com to start a blog – but it’s the best way for anyone who’s serious about blogging. Trust me, you will be glad you made this choice in the long run. Plus, I can help you start your blog with discounts so you save money.
Most serious bloggers who start out with a free blog later realize the limitations and ends up having to switch to a hosted blog or start over from scratch. Switching your free blog over to a hosted blog is much more difficult than setting up a hosted blog from the start.
Why WordPress and Why Hosting?
Managing a blog is much easier when you have software like WordPress to handle the organization of each of your blog posts. Many big brands like Time, Vogue, Forbes, and Tech Crunch all use WordPress to manage their websites.
I started my very first blog with Blogger. I tried out WordPress with my second blog and I haven’t looked back since.
To maintain freedom and flexibility with your blog, it’s best to pay for hosting. In exchange, you have more ownership over your blog, including the ability to make money from it. Free blogs don’t let you do this.
WordPress is free, but you have to pay for hosting on a monthly or annual basis.
The host allows you to use a certain amount of space on their web servers and allows you to store different kinds of files – like your WordPress software and all your blog posts and images.
You want to choose a reliable host that’s going to be online all the time. When visitors go to your site, you don’t want them to get errors. This is why I choose HostGator year after year. I’ve never had problems with my blog going down and the two times I’ve had to contact customer service, they were nothing but helpful and friendly.
The Basic Pieces of Setting Up a Self-Hosted Blog
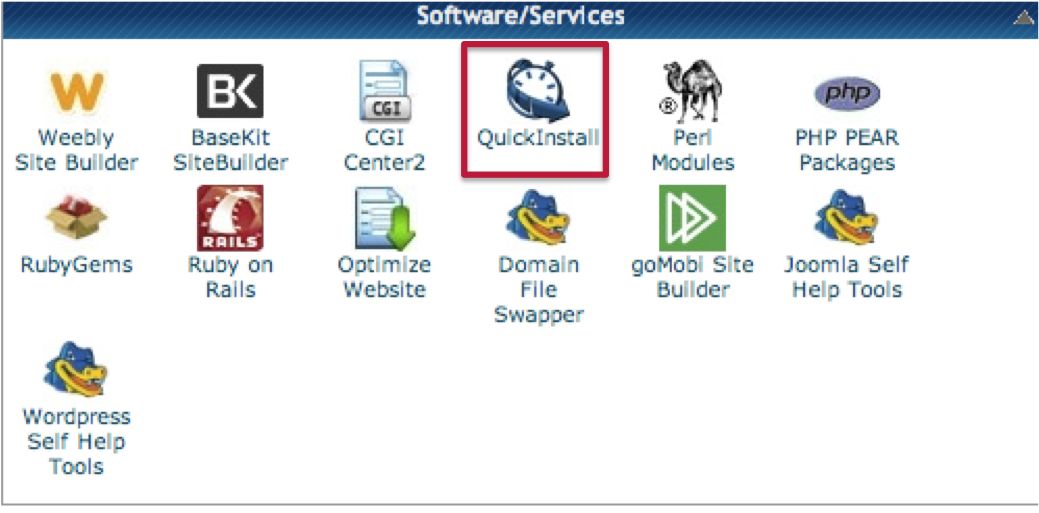
HostGator has a QuickInstall that lets you set up WordPress with just the click of a button. You don’t need any technical knowledge and you don’t have to know any coding. Thank goodness!
The final piece – or it may be the first thing you purchase – is your domain. The domain is the www. name you choose for your blog. You’re going to use this for awhile, so choose carefully. I like to use GoDaddy to figure out whether the domain I want is available.
Let’s Get Started
Setting up the domain and hosting
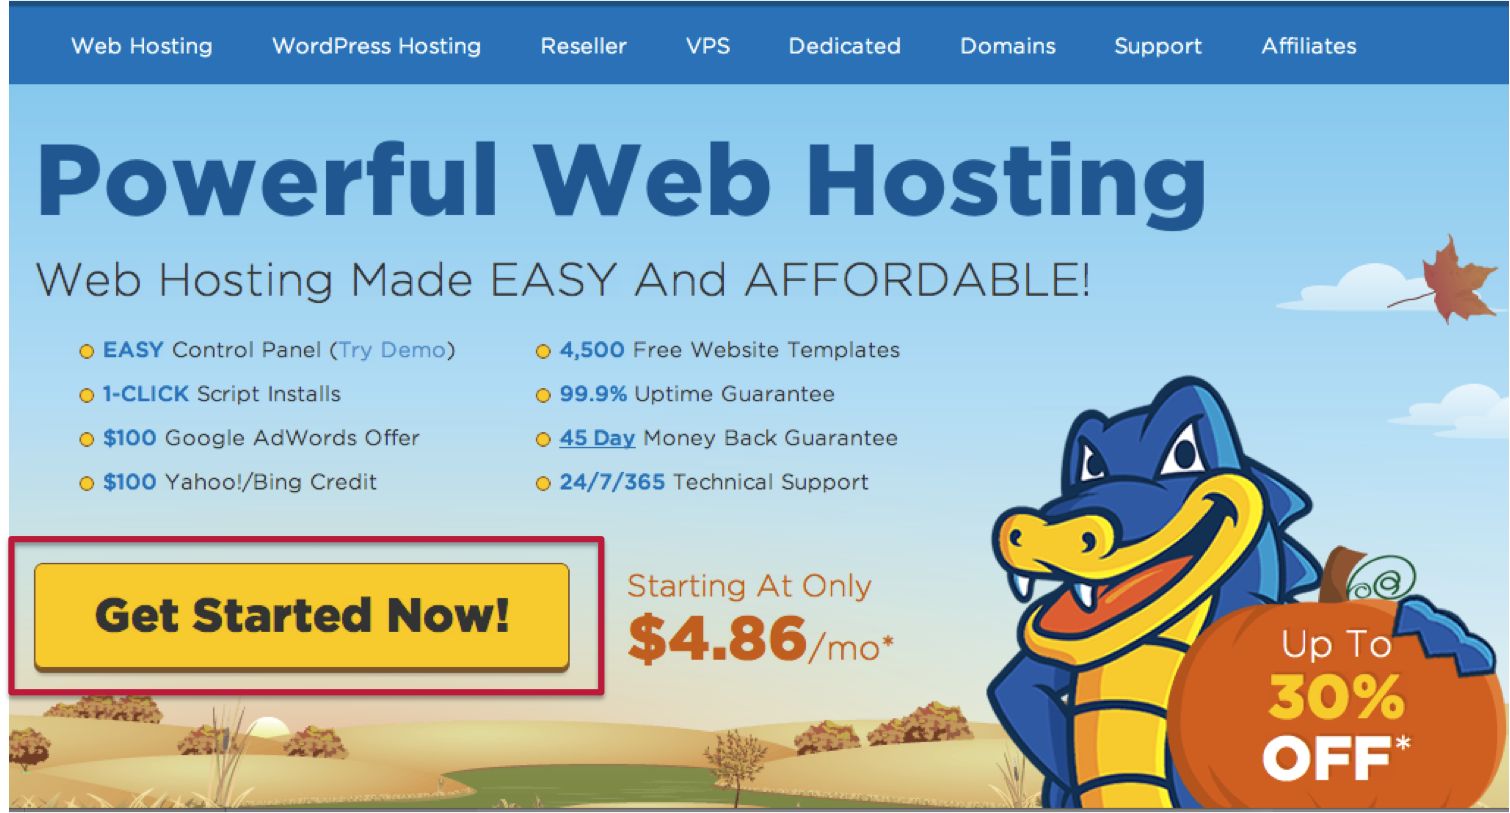
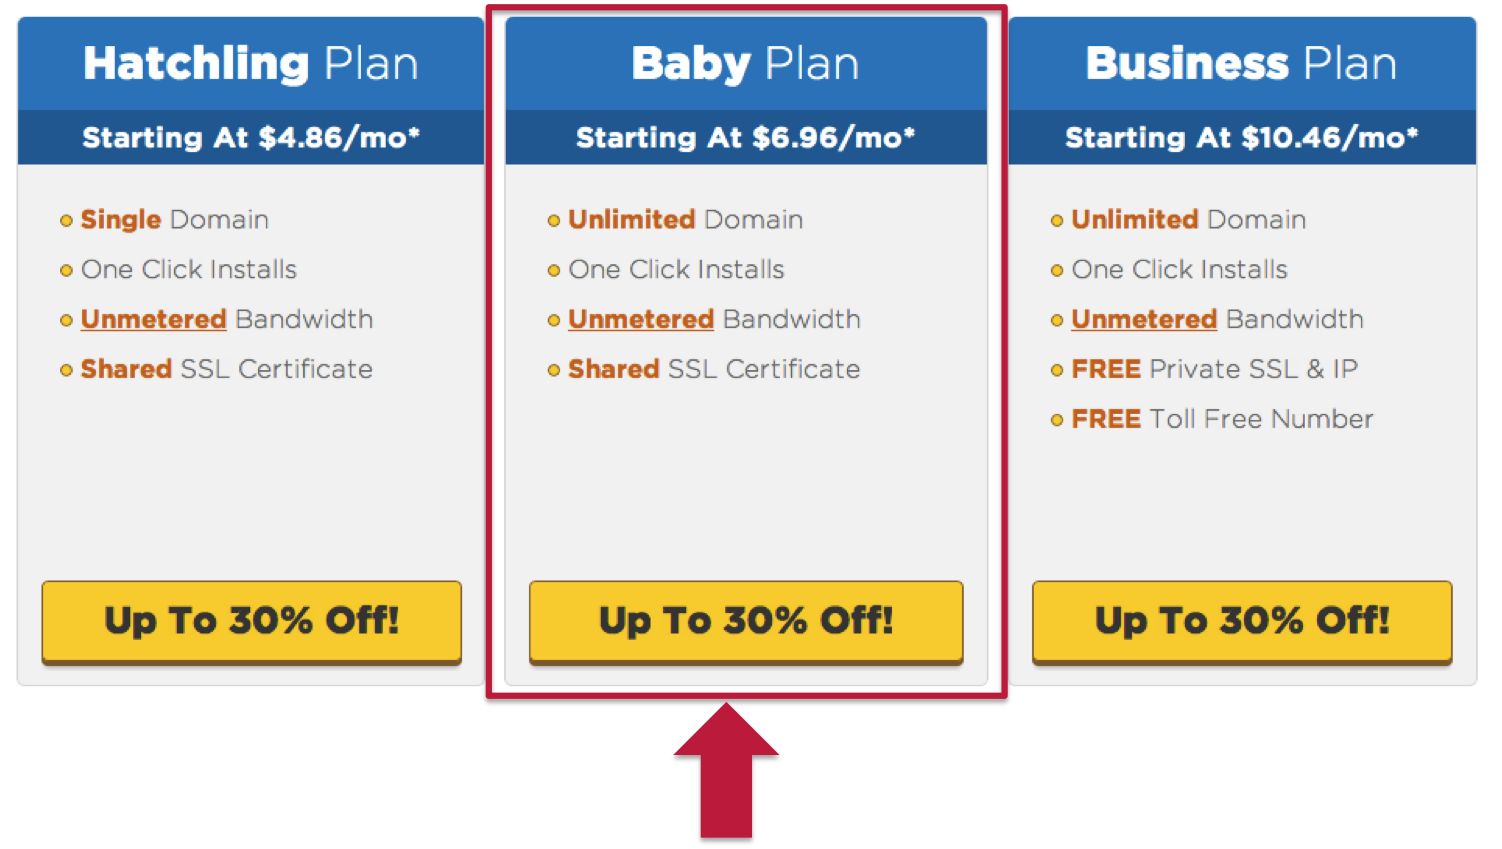
Start by going to HostGator.com and click on Web Hosting. Choose the Hatchling Plan if you plan to only have one WordPress blog. If you think you’ll start another blog in the future, choose the Baby Plan. You can always change your plan in the future if you decide you need more features.
In the next step, you can enter the domain you want to register or choose “I already own this domain” if you have a domain that you’ve already purchased. You’ll have to set up the nameservers to point to HostGator after you’ve purchased your hosting package. Instructions for how to do this are at the very bottom of this page.
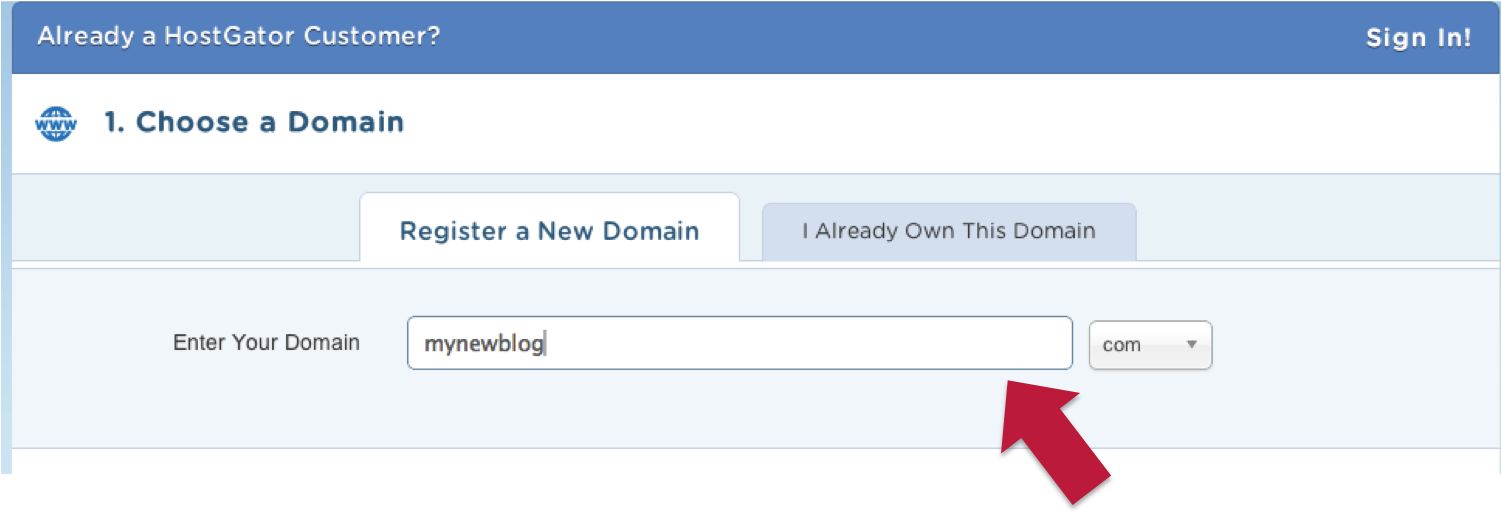
HostGator will alert you if you’re trying to select a domain that’s not available. If that happens you’ll have to choose a different domain name. Many of the easy to remember domains are already taken, so you’ll have to get creative with your domain name. Make it memorable.
Select your hosting package and the billing cycle. Paying for more months upfront gives you greater amount of savings. If you’re in it for the long haul, you can pay for up to 36 months of hosting with your initial registration.
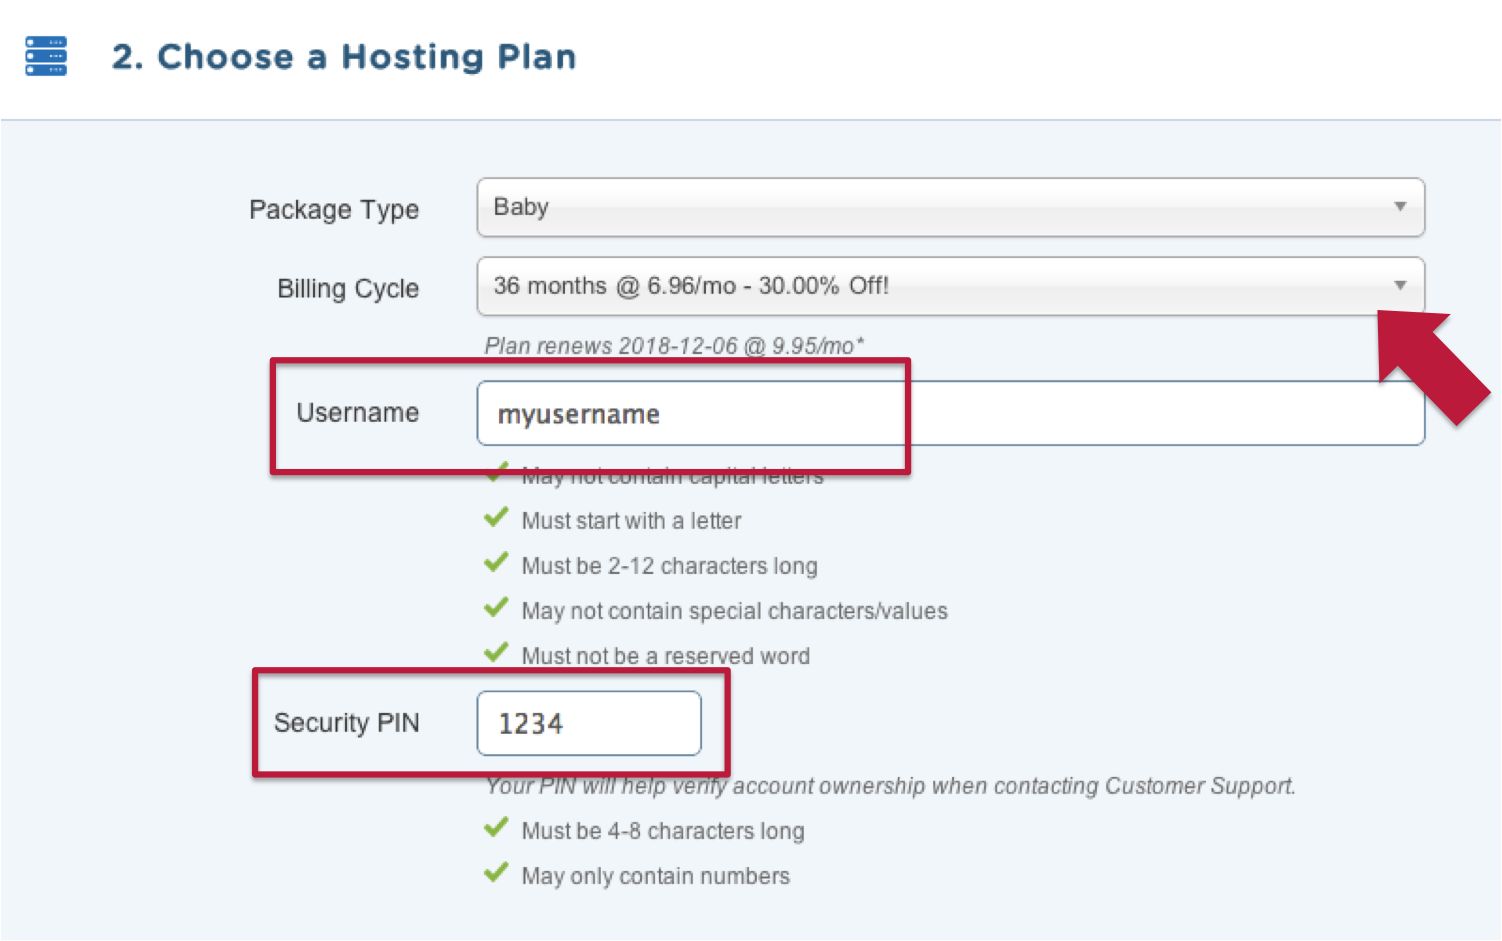
Choose a username and security pin.
Next, enter your billing information. HostGator will use this billing information to invoice you when it’s time to renew your hosting.
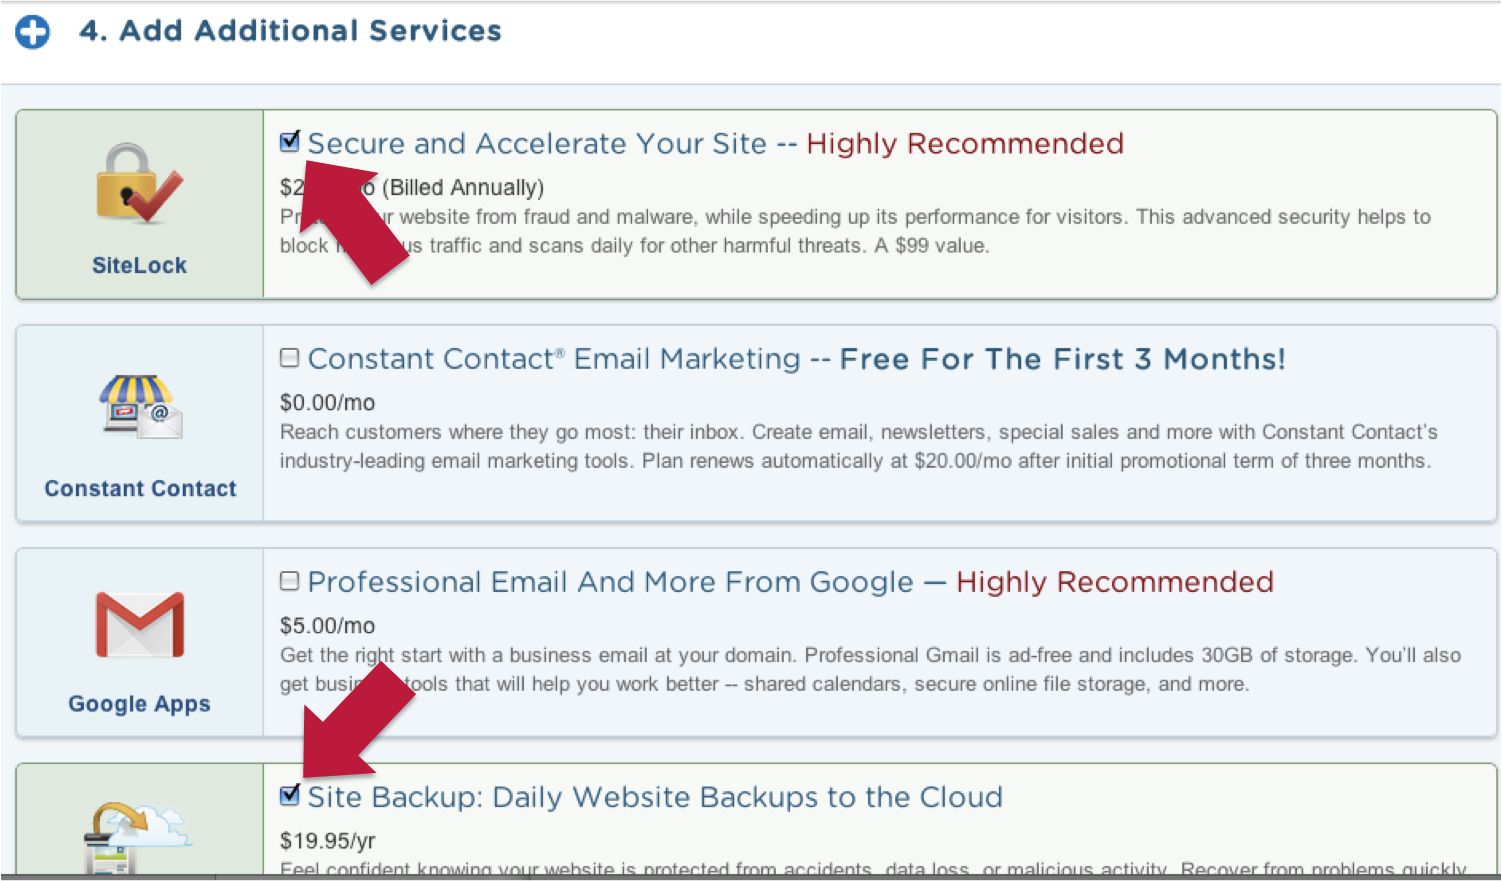
You can add additional services or uncheck all the boxes to pay only for your domain and hosting.
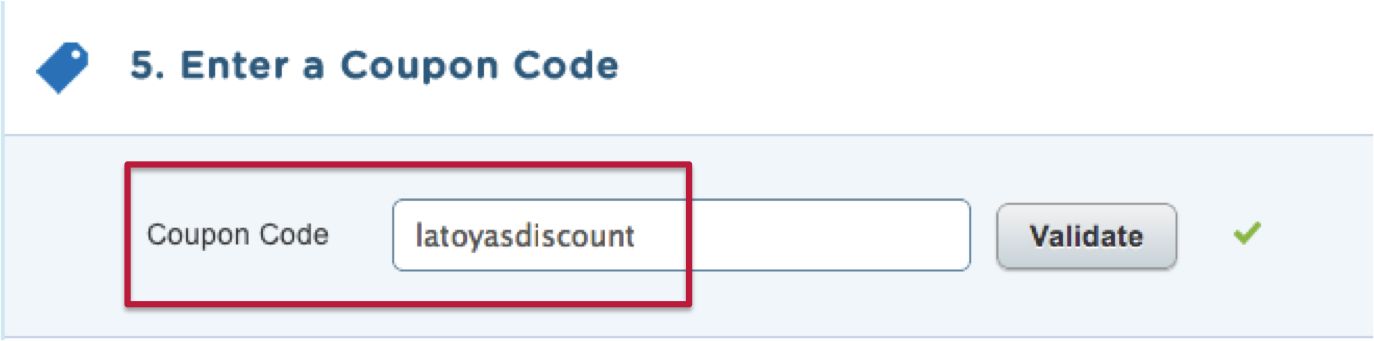
Enter my promo code GET25OFF to get 25% off your order. If you pay for a full year of hosting and your domain, you’ll save almost $38 off your purchase!
Disclaimer: I earn a commission when you use my promo code to sign up for HostGator. I’m recommending HostGator because of my experience using their services. If you make a purchase through my affiliate link, thanks so much for your support.
Review your order and the Amount Due, agree to the Terms, and Checkout.
You now have hosting and a domain! You’re halfway there.
Check your inbox for an email from HostGator.com – it may be in Spam or Junk, so check there, too. The email contains your username, password, and a link to the control panel (HostGator calls it cPanel) where you still administer your account.
Installing WordPress
Use the details from your email to log on to your cPanel, scroll down look for an icon that says “QuickInstall” this is the button you will use to install WordPress.
On the next page, look for the link that says “Install WordPress.” It will take you to a page that lets you Install WordPress on your domain.
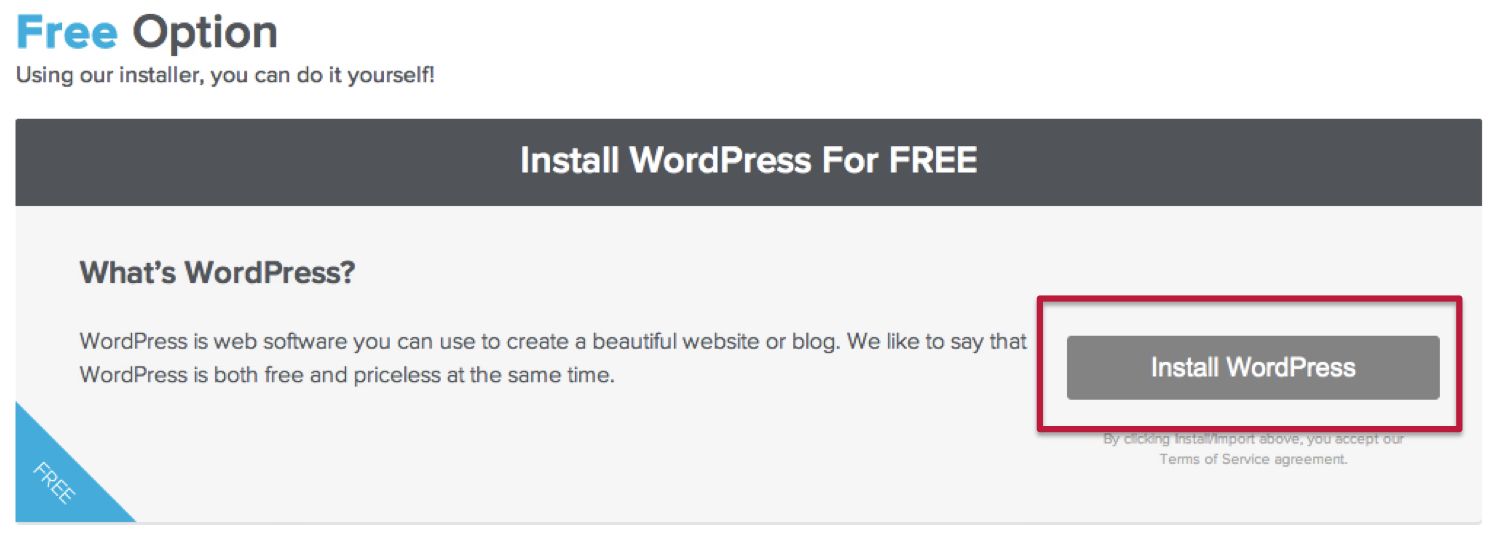
Enter your details into the form.

Log on to WordPress for the First Time
Check your inbox for an email including your WordPress username and password. This is how you will login to WordPress by going to : yourdomain.com/wp-admin.
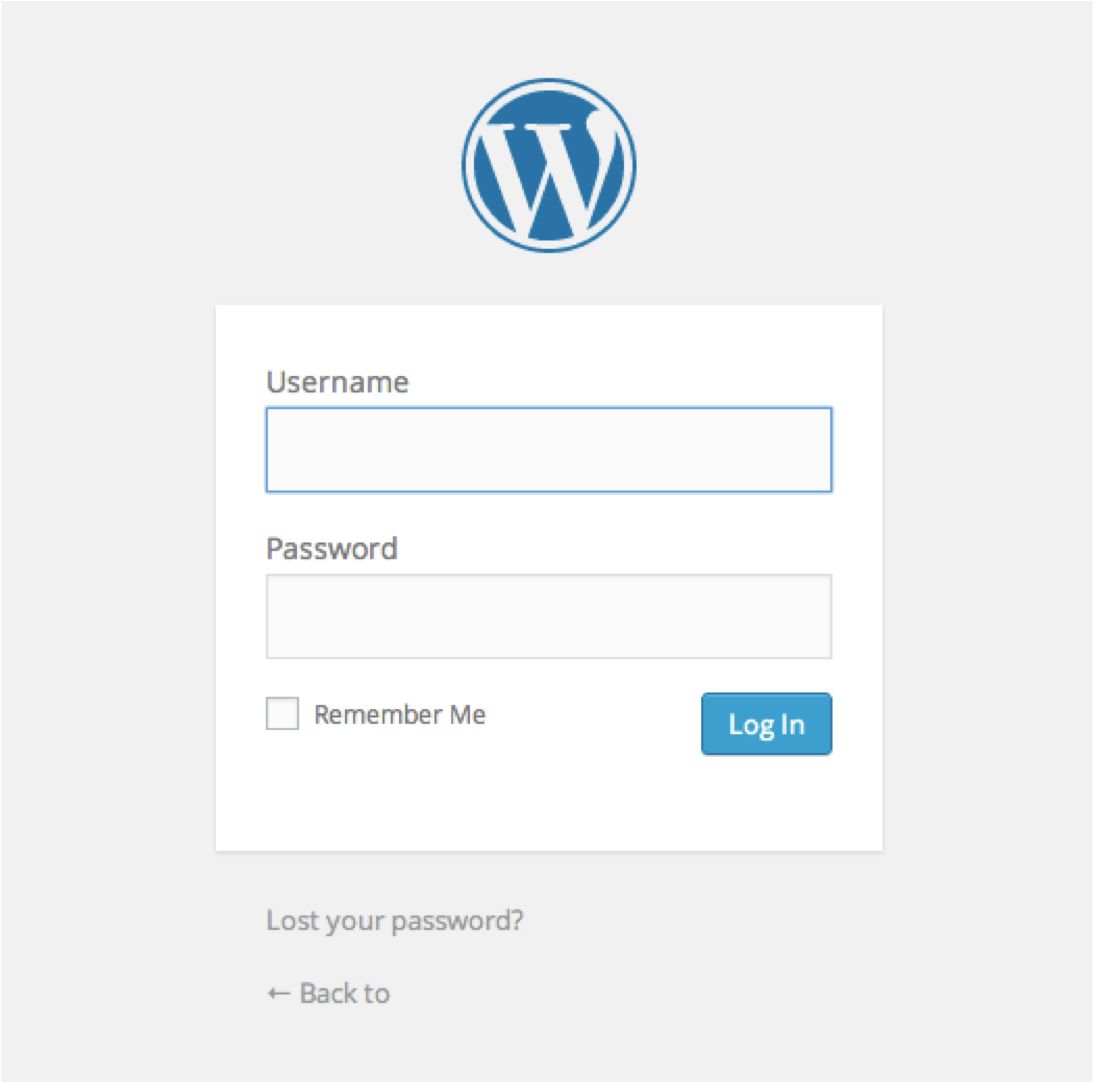
You’ll be taken to your WordPress dashboard where you can start posting!